Operational Manual
- Home
- Operational Manual
Dear Valued Customer
[A] Please Note: In this User Guide – eSIM/SIM is used here interchangeably, which may mean the explanation for each point explained is applicable to either the eSIM or the Smart SIM (SIM) or applicable only to the eSIM or the Smart SIM while in some points, the explanation is applicable to both whether an eSIM or a Smart SIM (SIM) mentioned. The Smart SIM is a physical SIM while the eSIM is an embedded SIM or a virtual SIM. Customer Self-Care Portal is used interchangeably to mean ‘’Customer Experience Self-Care Portal’’ or ‘’ Customer Self-Care’’ or ‘’Account Self-Care’’ or ‘’SIM Control Panel’’ or ‘SIM CONTROL PANEL’’ Also, there is an eSIM could also come in the form of a plastic Card where the QR Code of the eSIM is printed on the plastic Card, which could be scanned, downloaded and installed in a mobile device as well. DID/LPN here means ‘’Direct Inward Dialing (DID) or Local Phone Number (LPN) means the phone number of the eSIM or Smart SIM.
[B] * eSIM
Installing and Activating eSIM QR Code in a Smartphone or Device by scanning a QR Code:
Note: If you are ordering the Global eSIM or SIM via our Signup portal. After clicking on the link, you will receive another email with the subject “Subscriber info” and then in that email, it will come with the eSIM or SIM ICCID #, login credentials, and a copy of eSIMs QR Code image attached, and/or displayed in the email body. If you try scanning the QR Code of the eSIM and it is not installing in your eSIM-supported device, please when you logged into your Customer Account Self-Care Portal, there the eSIM QR Code and Softphone App QR Code or Geokall Softphone QR Code will be displayed as well. You can scan with your eSIM-supported device to install the eSIM QR Code in your newly created Account Self-Care Dashboard.
– START USING YOUR GLOBAL eSIM – QUICK Methods in Downloading & Installing eSIM or inserting a physical SIM to:
- Access Data
- Calls & SMS
– Placing and Receiving Calls (eSIM or SIM) via eSIM direct
– Placing and Receiving Calls (eSIM or SIM) via the Softphone
– Sending and Receiving SMS (eSIM or SIM) via Softphone
1) Download one of the QR Code and have it shown in your computer screen or in another Smartphone screen or you can as well print it on a paper
2) Please, go to your Settings tap in your Smartphone device and tap on ‘’Mobile Data’’ or ‘’Network & Internet’’ and then click on Add or the “+” sign of SIMs/eSIMs and then select ‘’Download a SIM instead’’
3) Put on your Smartphone camera and then point it to the QR Code. It should be able to install the eSIM automatically.
4) Go back to the ‘’Settings’’ and the on ‘’Mobile Data’’ or ‘’Networks & Internet’’, tap on the newly installed eSIM, click on active eSIM or use eSIM (whichever) and then ‘’eSIM’’ select as or make this eSIM as the primary network for ‘’Data’ or ‘’Mobile Data’’ or ‘’Cellular Data’’. There are two options – Calls/SMS and ‘’Mobile Data/Cellular Data’’. Select the ‘’Mobile Data’’ or ‘’Cellular Data’’ as default for this eSIM.
5a) APN – Go back to the ‘’Settings’’ and tap on the newly installed eSIM (it might be generic name SPN or just as eSIM) and scroll down to the ‘’Access Point Names” or ‘’APNs’’. Some eSIM supported Devices will automatically program and create the APN name which is ‘’fastaccess’’ or ‘orange’’ or ‘’uwap.orange.co.li’’ or ‘’interlop’’ of this Global eSIM. If you did not see ‘’fastaccess’’ or ‘’orange’’ or ‘’interlop’’ APN name, please create an APN ‘’fastaccess’’ and if there is a safe button (depending on the phone type), save it, otherwise once created, it saves automatically.
5b) APN – In some devices, such as iPhone, after installing the eSIM or SIM, you will see an APN ‘’internetipv6’’, which is a new native APN same as “internet”. In some cases where the username/password were not empty when this APN was used by the device. If you got the APN ‘’internetipv6’’, this is ok and should work as well – but please double check that “username” and “password” is empty (if not, ask the user to delete it).
6) Still or go back to your phone ‘’Settings’’ and then ‘’Network & Internet’’ and then to the installed eSIM and tap it.
7) Disable or turn off any ‘’WiFi’ button to be off if it is on in your Smartphone or Device.
8) Ensure you have ‘’Call & SMS’’ button off if it is on.
9) Click or enable ‘’Mobile Data’’ or ‘’Cellular Data’’ on if it is off
10) Click or enable ‘’Roaming’’ on if it is off. Always ensure the ‘’Roaming’’ icon is on
11) Disable or turn off the ‘’Automatically select network’ button if it is on. Turn it off.
12) Disable or turn off ‘’ Allow 2G and/or 3G’ button if it is on. Set your Phone/Device to be on ‘’4G’’ Roaming or ‘’4G/5G’’, depending on your device type.
13) If your device asks you to choose a network type: select 4G or 5G. However, it is advisable to select 4G as 5G is not readily available in some regions in some countries.
14) Select ‘’Choose network’’
15) Your Smartphone will trigger the eSIM to search available networks in your region/country:
16) Network selection – e.g., in the United States, you can select either AT&T or T-Mobile network after the manual search. Pease selects any of these networks below and save it on the network selected.
Access Data
The network selected will show in the network active icons in your Smartphone or Device screen. You should carefully observe it if the Global eSIM network icon picks show a 4G or LTE network and it will indicate the name of the network it is roaming on and mostly likely include the term Roaming or ‘’R’’. If it has not picked up network, go back to your phone ‘’Settings’’ and then go to ‘’Network & Internet’’ and tap to select the Global eSIM or the eSIM and enable it to use for ‘’Data’’ or ‘’Mobile Data’’ or ‘’Cellular Data’’; enable Roaming and ensure that the automatic network selection icon is off, so you can manually search and select a 4G network and save it on. For some regions, the Global eSIM could pick 5G network if your Smartphone or Device is a 5G phone, it will work with the Global eSIM or eSIM/SIM if there is a 5G coverage in that location (Country/City).
– Try first accessing your social media (WhatsApp, Facebook, etc. accounts) to see if they work; your favourite YouTube Channel, visiting a website, checking your email, etc. and it they open, then your data access is confirmed. In some locations, you may need a little time, few minutes or even up to few hours for the data access to work.
Thirteen (13) Summarized Rules for accessing Data service anytime anywhere and in any country on the Global eSIM or Global SIM in your Smartphone or Device:
i) Ensure that you disable the WiFi connection and WiFi connection is always off anytime you want to access mobile data with your Global eSIM.
ii) Go back to your Phone Settings and then click or tab ‘’Network & Internet’’
iii) Select the Global eSIM or Global SIM in the list of eSIMs or SIMs.
iv) Enable ‘’Mobile Data’’ or Cellular Data’’
v) Enable the ‘’Roaming’’
vi) Enable MMS messages
vii) Disable ‘’Allow 2G’’ or disable ‘’2G/3G’’ and select 4G/LTE or even 5G if a 5G network is available in your country/region and it categorically displayed 5G if your current Device or Phone is a 5G phone. Please, note 4G network is the same as LTE. So, when you see LTE in front of one of the networks displayed, please select it and save it.
the Global eSIM or SIM
viii) Disable or uncheck ‘’Automatically select network’’ button or whichever tag name listed on your phone.
Note: Always ensure that the ‘’Automatically select network’’ mode button or whichever tag name listed on your phone’’ button or box is ‘’unchecked’’ or ‘’Not enabled’’. Sometimes, your phone will automatically reset to ‘’Automatically select network’’ mode, please uncheck it and ensure that it is always on ‘’Manually select network’’ mode. So, with such you could be able to select a network with a fast data service on 4G or 5G, the latter if coverage is available in the city/region you are roaming on and if your device is a 5G device.
ix) Once you disable or uncheck ‘’Automatically select network’’ button, your Global eSIM will be promoted to search for all available networks in your country or region. Please, allow few minutes to check and then all available networks will be displayed.
x) Always ensure that your phone is on manual selection mode for the selected 4G, 4G/LTE or LTE network or 5G in your country/region an save it. If you are living that country, you may be able to know network that has the fastest data speed, so select that network. In the United States, AT&T Mobility has the fasted data speed on GSM network technology, so you can select this. Although, bear in mind that the faster the data speed, the more expensive is the cost for data service on that network.
xi) APNs (Access Point Names) – If you have not created an APN for the Global eSIM or SIM, please create it as explained in #5) under ‘’Access Data’’ above. If you have created it ensure that it has an APN name for the Global eSIM or SIM as ‘’fastaccess’’ or ‘orange’’ or ‘’uwap.orange.co.li’’ or ‘’interlop’’ of this Global eSIM. You should see one of the names above. You may also see ‘’3G Portal’’ or ‘’Hybrid Portal’’ or ‘’Roaming Portal’’ as subject name above the APN, please, leave it as it is a designation of it. 3G Portal does not mean that you cannot roam on a 4G or LTE network. You will roam on 4G or LTE network (if it is available in your country/region) on with the Global eSIM.
xii) You can then check the upper right or left side of your Smartphone or Device screen, and you will see the active Telecom networks. The Global eSIM or SIM will have been showing ‘’R’’ or ‘’Roaming’’ and if it has picked up a 4G network or 5G network, it should be showing either 4G or LTE or 4G/LTE Roaming and for 5G, it will show 5G Roaming.
xiii) Your Global eSIM or SIM data service is now on, you can then visit your favourite websites, check your email, check your social medial accounts, etc and do with whatever you want with the Global eSIM or SIM Data. But remember you should have sufficient airtime and if you do not you can top up airtime for your Global eSIM or SIM.
- Calls & SMS
– Placing and Receiving Calls directly with the eSIM or SIM
– Placing and Receiving Calls with the Softphone
– Sending and Receiving SMS with the Softphone
- Notes on Receiving Calls on the eSIM or SIM and the Softphone
– Receiving Calls directly on the eSIM or SIM is NOT FREE
However, the cost for incoming calls on the eSIM or SIM is very small and on some networks in some countries very insignificant.
– Receiving Calls directly on the eSIM Softphone IS FREE and must have the eSIM Cellular Data or any Cellular Data or WiFi network from any third-party active in the Device
For Devices or Smartphones with Dual-SIM and/or eSIM Support
To place and Call and/or to receive Call, send and receive SMS, go back to your phone ‘’Settings’’’ and then to ‘’Mobile Data’’ or ‘’Network & Internet’’, and then to and/or tap the ‘’Calls & SMS’ icon or tab, depending on your Device Type Call functionality, it will ask you if you want to:
Calls & SMS –
– Placing and Receiving Calls (eSIM or SIM)
* For Calls direct via the Global eSIM or SIM
For Calls (if there are other network SIM or eSIMs from other networks) already in your device): Tap the ‘’Calls’’ or ‘’Calls/SMS’’ tab:
– AT&T Mobility
– eSIM (or Global eSIM)
– eSIM (from another provider)
You should select the Global eSIM or Global eSIM or Global SIM if you want to use it place a Call, that is via the Global eSIM or eSIM.
While for some Devices, if it is Dual SIM or Dual eSIM support, it will display the followings:
– AT&T Mobility
– eSIM (or Global eSIM)
– eSIM (from another provider)
– Ask every time.
If you select the ‘’Ask every time’’, which is advisable to select this, which means anytime you want to place a Voice Call, after typing in the phone number or selecting the contact person you want to call, your device or phone call feature will ask you which SIM network or eSIM you wish to use to place the call. It is highly recommended you set this option so that anytime you want to place a call, your phone call feature will ask you to select the network you want to use to place the call.
Please, note that there is free incoming call-in 200+ countries on our premium DID Phone Numbers mapped to the Global eSIM or SIM when answering the call on the Global eSIM Softphone. But answering the call directly on the Global eSIM or SIM is not free but will incur small fee.
* For Calls via the Global eSIM Softphone on Geokall Softphone App.
For Calls – If you already have the Global eSIM Softphone app already scanned and installed in your Smartphone and/or Device and you have registered your eSIM on it, you can place calls and receive calls via this Global Softphone installed in your Smartphone or Device to any phone number in the world.
You must either utilize the Global eSIM Mobile Data service or the Mobile Data from another eSIM network or a WiFi connection to use your Global Softphone app. The data service must be on.
You can place and receive calls via your Global eSIM Softphone app.
However, if your Global Softphone app is set to be active (that is, as long as the data service or wifi connection is on in your Smartphone or Device), whenever an incoming call is coming in, the call will not first ring on your Global eSIM directly, but it will be routed to the Global Softphone app where the call will first ring for you to answer it. When the call is coming in and you click on the picture or picture image icon on the incoming call interface on your Global Softphone app, it will open the picture or picture image icon and below the picture image, you will see three (3) options as per below:
‘’answer the call’’,
‘’decline the call’’.
‘’reject the call’’.
If you click on answer the call, you will be connected to the party that is calling you.
If you decline the call, it may terminate the incoming call.
If you reject the call, it will terminate the incoming call on the Global Softphone and then rings on your Global eSIM or SIM directly if the calling party did not terminate the call. The incoming call will continue ringing on your Global eSIM or SIM as long as the caller did not terminate or end the call, or the incoming call will continue ringing on your Global eSIM or SIM until it terminates at the caller end.
If the data service in your Smartphone or Device is off, that means the Global Softphone app is inactive and all incoming calls will ring directly on your Global eSIM or SIM for calls placed to your Global eSIM DID phone number or to any of the phone numbers mapped to your Global eSIM or SIM.
It is almost taken to be free incoming calls on the Global Softphone app for incoming calls placed to your Global eSIM DID phone number, but with a little data charge, which is cost savings.
If you want incoming calls to ring directly on your Global eSIM Softphone, just ensure your Global eSIM Cellular data is on or active on your Smartphone or Device. It will ring first on your Softphone for you to answer the call. If you the incoming calls to ring directly on your Global eSIM or SIM, then do the followings when there is an incoming call:
– Tap the Softphone app on the Geokall Softphone App icon in your Smartphone or Device
– Click on the three (3) dots at the upper right side.
– Click or select ‘’Settings’’.
– Click on ‘’Incoming Calls
– There are two options there – Push notifications’’ and ‘’Off’’.
Select or check the ‘’Off’’ circle and this will prevent incoming calls to ring on the Global Softphone app even though your data service is active, but the incoming calls will ring directly on the Global eSIM or SIM directly. You can go back and enable or check the ‘’’Push notifications’’ circle to allow calls to be routed to the Geokall Softphone app whenever calls are placed to your Global eSIM DID phone number.
While for some Devices, if it is Dual-SIM support, it will display the followings:
Calls & SMS –
– Sending and Receiving SMS (eSIM or SIM).
For Devices or Smartphones with Dual-SIM Support
For SMS (if there are other network SIMs or eSIMs from other networks) already in your device): Tap the SMS tab:
– AT&T
– eSIM (or Global eSIM)
– eSIM (from another provider)
You should select the Global eSIM or Global eSIM or Global SIM if you want to use it to send a Text, that is via the Global eSIM or eSIM.
While for some Devices, if it is dual-SIM support, it will display the followings:
– AT&T
– eSIM (or Global eSIM) or eSIM (from another provider)
– Ask every time.
If you select the ‘’Ask every time’’, which is advisable to select this, which means anytime you want to send a Text, after typing in the phone number or selecting the contact person you want to send a text, your device or phone SMS feature will ask you which SIM network or eSIM you wish to use to send the text. It is highly recommended you set this option so that anytime you want to send a text, your phone SMS feature will ask you to select the network.
To place a Voice Call, always type in the plus or ‘’+’’ sign in front of the country code followed by the phone number. E.g., to dial a US phone number – +1 234 567 8910. For some other countries, there ‘’0’’ comes in before the mobile number, e.g., the United Kingdom, dial +44 712 345 6789.
If you don’t have any DID phone number mapped to your eSIM or SIM, please order a DID phone number by sending an order request to: sales@geokall.com
To receive Voice Call direct on the eSIM or SIM, the party calling you should dial your Global eSIM or SIM phone number with and/or including the plus or ‘’’+’’ sign with the country code followed by the phone number. For dialing a US phone number from the Global eSIM or SIM with a US phone number, you may first try dialing without the plus or ‘’+’’ sign and without the US country code 1, if it does not go, then try dialing with the complete international format. Same, likewise with other country phone numbers same with the Global eSIM or SIM phone number.
The same formats above are applicable for sending text message as well.
If you are having issues in some regions to receive incoming calls, you can utilize our Mobile Brand Softphone.
Softphone App to receive incoming calls on your Global eSIMs or SIM DID phone number. See information below:
START USING YOUR GLOBAL eSIM – Mobile Brand Softphone
Mobile Brand Softphone
- Placing and Receiving Calls (Mobile Brand Softphone)
- Sending and Receiving SMS (Mobile Brand Softphone)
You can also place outgoing calls and receive calls, send, and receive text messages via our Softphone where the eSIM or SIM data is utilized, or another network SIM or eSIM data in your phone is utilized or a WiFi Internet connection on your phone is utilized. Your mapped Global eSIM or SIM DID phone will still be your Caller ID for both outgoing voice calls and outgoing text messages.
If you have not downloaded our Mobile Brand Softphone, please kindly log into your eSIM or SIM Account Self-Care Portal and follow the steps below:
We will ask that you follow the steps below to log in to download and install the ‘‘Mobile Brand Softphone.
As follows:
[1] Log into your eSIM/SIM and you will see the ‘‘Mobile Brand Softphone in your account dashboard.
Steps:
* Install the Geokall Softphone application first. To do it, there are QR codes in the Account Self-care interface that link to the Geokall Softphone pages in the Apple Store and Play Market
Point your Smartphone camera to the either the ‘’Apple Store’’ or ‘’Google Play Market’’ QR Code image (depending on your Device OS). The Geokall Softphone App will be installed.
* Once installed, point your Smartphone or Device camera to ‘‘Mobile Brand Softphone’’ QR Code image by scanning the top QR code with the Geokall Softphone application already installed.
* Once the ‘‘Mobile Brand Softphone’’ app has been installed by the Geokall Softphone application, it should automatically allow you to follow some processes to complete the installation.
* Thereafter, check the Geokall Softphone app in the list of apps installed in your Smartphone/Device and click on it, you it will open and then you can view and access all the features on via the various icons/links.
* You can click on the key board panel tap to type a phone number or by pulling out the contact phone number from your list of your synchronized contacts and dial the number in the formats as explained in the eSIM or SIM direct call.
Note: Ensure that you save your contacts phone numbers in the international dialing format as secondary so when pulling out your contact phone number to place a call, it will be the secondary save number in the international dialing format, so you don’t need to edit it, but to place the call.
* You can click on the text/message icon (which is an envelope) tap the plus or ‘’+’’ sign to send text message as well by composing the text message and typing the phone number of the party you want to send the text or by pulling out the contact phone number from your list of your synchronized contacts and dial the number in the formats as explained in the eSIM or SIM direct call.
Note: Ensure that you save your contacts phone numbers in the international dialing format as secondary so when pulling out your contact phone number to send a text, it will be the secondary save number in the international dialing format, so you don’t need to edit it, but to send it.
General or usual method in installing an eSIM in your Device:
Installing and activating eSIM in a Smartphone or Device without scanning a QR Code (that is installing eSIM manually in your Smartphone or Device):
Installing and Activating eSIM Code for in a Smartphone or Device without scanning a QR Code?
[1] First, your Smartphone or Device must support eSIM.
[2] Go to your Smartphone or Device ‘’Settings’’.
[3] Navigate to ‘’Cellular/Mobile’’ or ‘Mobile Plan’’ or ‘’Mobile DATA’’ or ‘’Cellular Data’’ or ‘’ Mobile Service’’.
[4] Tap or Click ‘’Mobile Plan’’ or ‘’Mobile DATA’ ’or ‘’ Cellular Data’’ or ‘’Mobile Service’’.
[5] Enter Details Manually, that is type in both the SM-DP+ Address and the Activation Code.
[6] Your eSIM will auto install in your Smartphone or Device.
[7] You will see a message displays on your Smartphone or Device screen for your newly installed eSIM on a roaming network in the country you are located. Your Global eSIM UK Phone number may also display on your Smartphone or Device screen.
[8] You will also receive an SMS shortly with your Global eSIM UK Phone number.
[9] If can then purchase or top up airtime credit for your eSIM account and use as Pay As You GO plan for DATA, VOICE or SMS if your eSIM did not initially come with a prepaid Airtime Credit.
[10] You can also purchase/subscribe for any of our DATA bundles by going to our website or through your eSIM CONTROL PANEL or Self-Care Portal to purchase or subscribe for a DATA bundle.
[C] * Physical SIM Card
Your handset must be an unlocked GSM phone!
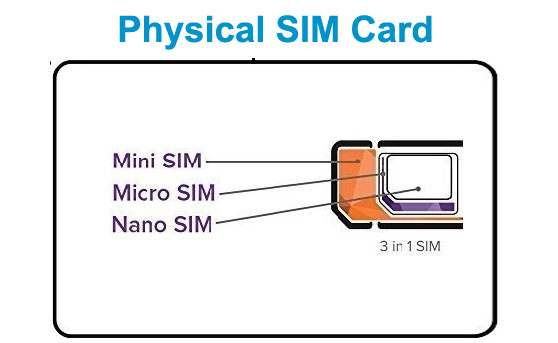
Check whether your handset SIM compartment is for a Mini, Micro or Nano SIM
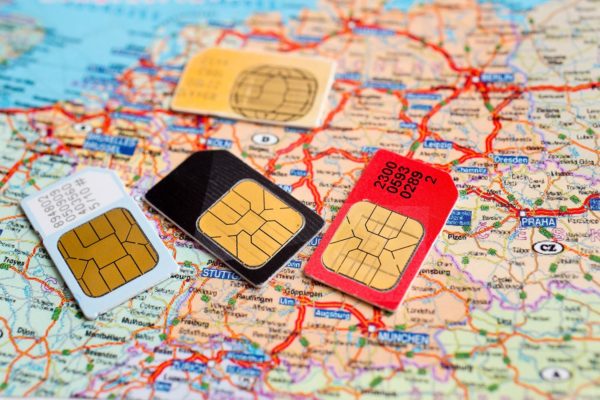
- Break off the SIM from the SIM Card. You should first check whether your handset SIM Compartment is for Mini (Standard) SIM), Micro SIM or Nano SIM. The (Mobile Brand Name) SIM Card is now a Triple Punch SIM Card whether for Mini SIM, Micro SIM or Nano SIM Phone. So, depending on the SIM Compartment type of your handset, you can break off the SIM from the Card for a Mini, Micro or Nano type of Phone.
- Insert the SIM into your handset SIM compartment and then switch on your phone. Once you switch on your phone, you will be automatically connected to a network, and you will receive an SMS shortly containing your new (Mobile Brand Name) UK mobile number. Should your phone not automatically register on a network, please do a Manual Search and
- Select the network to roam on. However, it is always advisable to disable the automatic network selection icon and then do a manual network search to select the best and reliable 4G or LTE network in your location.
- Your SIM is successfully inserted in your Smartphone or Device.
- If can then purchase or top up airtime credit for your SIM account and use as Pay As You GO plan for DATA, VOICE or SMS if your SIM did not initially come with a prepaid Airtime Credit.
- You can also purchase/subscribe for any of our DATA bundles by going to our website or through your eSIM-SIM Account Self-Care Portal to purchase or subscribe for a DATA bundle.
- Note: Some features listed in this manual may not be available for your eSIM or SIM type as programmed. If you need further help, please us an email: support@geokall.com
[A] Please Note: In this User Guide – eSIM/SIM is used here interchangeably, which may mean the explanation for each point explained is applicable to either the eSIM or the Smart SIM (SIM) or applicable only to the eSIM or the Smart SIM while in some points, the explanation is applicable to both whether an eSIM or a Smart SIM (SIM) mentioned. The Smart SIM is a physical SIM while the eSIM is an embedded SIM or a virtual SIM. Customer Self-Care Portal is used interchangeably to mean ‘’Customer Experience Self-Care Portal’’ or ‘’ Customer Self-Care’’ or ‘’Account Self-Care’’ or ‘’SIM Control Panel’’ or ‘SIM CONTROL PANEL’’ Also, there is an eSIM could also come in the form of a plastic Card where the QR Code of the eSIM is printed on the plastic Card, which could be scanned, downloaded and installed in a mobile device as well. DID/LPN here means ‘’Direct Inward Dialing (DID) or Local Phone Number (LPN) means the phone number of the eSIM or Smart SIM.
OUTGOING CALLER ID CONFIGURATION
For the (Mobile Brand Name) eSIM/SIM
(Mobile Brand Name) – OUTGOING CALLER ID SET UP
We have configured our system where you can decide on the Outgoing Caller ID (UK number US number, Canadian number, Australian number, French number, Brazilian number, etc.) when placing a call with your (Mobile Brand Name) eSIM/SIM in any country. It does not matter whether you are in the US, UK, Germany, or any other country, you decide on the outgoing Caller ID when using your (Mobile Brand Name) eSIM/SIM. To set your Outgoing Caller ID, kindly log onto your (Mobile Brand Name) eSIM/SIM Control Panel and select the Outgoing Caller ID and then click the “Save Settings” button.
If you do not see this in your eSIM Account Self-Care Portal, please use the short dialing codes below:
160 or *160 – Set Caller-ID – You can dial it as 160*1234567890 OR *160*1234567890, where 1234567890 is one of the subscribers DID/LPN numbers.
142 or *142 – To retrieve a list of DID/LPN phone numbers mapped to the eSIM/SIM
160 or *160 – Setting DID/LPN as caller-ID – it is supported via short codes. An eSIM/SIM subscriber can dial *142 to receive a list of their DID/LPN phone numbers, and then dial *160*<DID/LPN> to set one of those phone numbers as caller-ID.
If you are still having issues, please us an email: support@geokall.com
VOICE MAIL SETTINGS & CONFIGURATION
[A] Please Note: In this User Guide – eSIM/SIM is used here interchangeably, which may mean the explanation for each point explained is applicable to either the eSIM or the Smart SIM (SIM) or applicable only to the eSIM or the Smart SIM while in some points, the explanation is applicable to both whether an eSIM or a Smart SIM (SIM) mentioned. The Smart SIM is a physical SIM while the eSIM is an embedded SIM or a virtual SIM. Customer Self-Care Portal is used interchangeably to mean ‘’Customer Experience Self-Care Portal’’ or ‘’ Customer Self-Care’’ or ‘’Account Self-Care’’ or ‘’SIM Control Panel’’ or ‘SIM CONTROL PANEL’’ Also, there is an eSIM could also come in the form of a plastic Card where the QR Code of the eSIM is printed on the plastic Card, which could be scanned, downloaded and installed in a mobile device as well. DID/LPN here means ‘’Direct Inward Dialing (DID) or Local Phone Number (LPN) means the phone number of the eSIM or Smart SIM.
VOICE MAIL SETTINGS & CONFIGURATION
For the (Mobile Brand Name) eSIM/SIM
To enable voicemail, a SIM subscriber can dial 123*1 (or *123*1 or 125*1 or *125*1). It will make all inbound calls go to voicemail.
To disable voicemail, a SIM subscriber may dial 123*0 (or *123*0 or 125*0 or *125*0).
To check voicemail status (enabled or disabled), a SIM subscriber may dial 123 (or *123 or 125 or *125).
To listen to recorded voice messages, a SIM subscriber may dial 988
If you are still having issues, please us an email: support@geokall.com
Short Codes for the Global eSIM & Smart SIM
[1] Please Note: In this User Guide – eSIM/SIM is used here interchangeably, which may mean the explanation for each point explained is applicable to either the eSIM or the Smart SIM (SIM) or applicable only to the eSIM or the Smart SIM while in some points, the explanation is applicable to both whether an eSIM or a Smart SIM (SIM) mentioned. The Smart SIM is a physical SIM while the eSIM is an embedded SIM or a virtual SIM. Customer Self-Care Portal is used interchangeably to mean ‘’Customer Experience Self-Care Portal’’ or ‘’ Customer Self-Care’’ or ‘’Account Self-Care’’ or ‘’SIM Control Panel’’ or ‘SIM CONTROL PANEL’’ Also, there is an eSIM could also come in the form of a plastic Card where the QR Code of the eSIM is printed on the plastic Card, which could be scanned, downloaded and installed in a mobile device as well. DID/LPN here means ‘’Direct Inward Dialing (DID) or Local Phone Number (LPN) means the phone number of the eSIM or Smart SIM.
[2] Please find the list of Short Codes and functions below:
Services Short Codes is Short Message Service (SMS) of the Multi IMSI eSIM & Smart SIM
187 or *187 – Balance check
Note: 187 or *187 – When you dial 187 or *187 Balance check code, you would receive back an SMS along with your available funds and a link to a simple web page, which would list available short codes below.
160 or *160 – Set Caller-ID – You can dial it as 160*1234567890 OR dial *160*1234567890, where 1234567890 is one of the subscribers DID/LPN numbers. If you have more than one DID phone numbers for mapped to your Global eSIM or SIM, all will show. You receive a text message shortly thereafter displaying all the DID phone numbers mapped to that eSIM or SIM.
142 or *142 – To retrieve a list of DID/LPN phone numbers mapped to the eSIM/SIM
160 or *160 – Setting DID/LPN as caller-ID – it is supported via short codes. An eSIM/SIM subscriber can dial *142 to receive a list of their DID/LPN phone numbers, and then dial *160*<DID/LPN> to set one of those phone numbers as caller-ID.
144 or *144 – Voucher recharge – You can dial it as *144*9876543210 or 144*9876543210, where 9876543210 is the voucher ID.
123*1 or *123*1 – Voicemail on.
123*0 or *123*0 or *125 – Voicemail off.
156 or *156 – Call forwarding. You can dial it as *156*1234567890 or 156*1234567890 to configure call forwarding to 1234567890.
156 or *156 – Call forwarding off. Dial *156 or 156 to turn call forwarding off.
154: *154 – Customer Support Line. Dial *154 or 154 to connect to our Customer Service line from your eSIM or SIM. However, note that this short dialing code may not be available when calling from some regions or countries. Please, contact us to know if this short code is available in your region or country you are located or calling from.
144 or *144 – Top up eSIM or SIM account balance with a voucher. It should be dialed as *144*<voucher ID> (e.g., *144*123456781234), the latter if the latter is the 12-digit voucher codes.
163: *163 – Bundle subscription and status – This short code dialing to subscribe for a data bundle or to check a data bundle subscription may not be available in some regions or countries. Please contact us to know if you can utilize this short code in your region or country.
DATA access APN: – Go back to the ‘’Settings’’ and tap on the newly installed eSIM (it might be generic name SPN or just as eSIM) and scroll down to the ‘’Access Point Names” or ‘’APNs’’. Some eSIM supported Devices will automatically program and create the APN name which is ‘’fastaccess’’ or ‘orange’’ or ‘’uwap.orange.co.li’’ or ‘’interlop’’ of this Global eSIM. If you did not see ‘’fastaccess’’ or ‘’orange’’ or ‘’interlop’’ APN name, please create an APN ‘’fastaccess’’ and if there is a safe button (depending on the phone type), save it, otherwise once created, it saves automatically.
If you are still having issues, please us an email: support@geokall.com
